Introduction
3D puff heat transfer vinyl is a specialty material used in garment decoration. It creates a raised, dimensional effect when heat is applied, producing a textured look that stands out from the fabric.
This article explains what 3D puff heat transfer vinyl is, how it works, and how it differs from standard heat transfer materials. It also covers where it is typically used, how to apply it, and how to troubleshoot common issues.
By understanding the technical aspects of this material, users can determine whether it fits the requirements of their project or production workflow.
What is 3D puff heat transfer vinyl
3D puff heat transfer vinyl is a type of heat-activated material that expands when exposed to high heat. Unlike regular HTV, which lies flat on the fabric, 3D puff vinyl rises to create a soft, dimensional surface.
Before application, the vinyl is typically around 0.16mm thick. After heat is applied, it puffs up through a thermal reaction, forming a raised texture that is visible and tactile. The expansion process is triggered by the heat press and controlled by time, temperature, and pressure.
This vinyl is often used for bold text, logos, and graphics on garments such as sports jerseys, sweatshirts, and caps. It's also referred to as "puffy vinyl" or "dimensional HTV" in the apparel decoration industry.
The material is generally PVC-free and made from polyurethane or similar compounds engineered to expand under heat. It gained popularity in the early 2010s as garment decorators began exploring more textured and layered finishes beyond flat vinyl applications.
Key benefits of the puff effect
The puff effect offers several advantages that make it popular for certain design applications:
-
Visual impact: The raised surface makes designs more noticeable and helps graphics stand out from flat fabric surfaces
-
Tactile quality: The expanded texture adds a touch element that creates a different experience compared to smooth vinyl
-
Embroidery alternative: The raised finish can resemble embroidery without using thread or embroidery machines
-
Perceived value: Dimensional designs often appear more premium than flat ones
3D puff vinyl works particularly well for sports numbers, team logos, and bold text where visibility is important. The raised effect can make even simple designs look more professional and finished.
For crafters and small businesses, puff vinyl offers a way to create specialty items without investing in expensive embroidery equipment. The material can transform basic garments into custom pieces with professional-looking dimensional details.
Essential specifications and fabric compatibility
3D puff heat transfer vinyl has specific technical characteristics that affect its performance. Before application, it's typically 0.16mm thick, expanding to about 0.5-0.8mm after heating. This expansion factor is important to consider when designing layouts.
Once applied, puff vinyl has limited stretch and doesn't recover well after stretching. It works best on stable fabrics rather than highly elastic materials.
Most brands offer puff vinyl in standard colors (black, white, red), fluorescent options (neon green, pink), and metallic finishes (gold, silver). These come in sheets (12"x15") and rolls up to 20" wide, though sizes vary by manufacturer.
Fabric compatibility depends on heat tolerance and surface stability. This table shows how puff vinyl works with common fabrics:
|
Fabric Type |
Compatibility |
Notes |
|---|---|---|
|
100% Cotton |
Excellent |
Best base material |
|
Polyester |
Good |
Test first |
|
Cotton/Poly Blends |
Good |
Works well |
|
Nylon |
Poor |
Not recommended |
|
Leather |
Not Compatible |
Avoid using |
Always test a small sample when working with unfamiliar fabrics. Materials with coatings or treatments may react differently to the heat and pressure needed for puff vinyl.
Application instructions for perfect heat press settings
Applying 3D puff heat transfer vinyl requires specific heat press settings. The puff effect happens through thermal expansion, which depends on the right temperature, pressure, and timing.
1. Pre-pressing the garment
Start by pre-pressing the garment for 10-15 seconds at about 280°F (138°C). This removes moisture and flattens the fabric. Moisture or wrinkles can cause uneven expansion and poor adhesion.
After pre-pressing, the fabric should be completely dry and smooth. This creates an ideal surface for the vinyl to bond with and expand evenly.
2. Setting temperature and pressure
For most puff vinyl, set your heat press between 280-325°F (138-163°C). The exact temperature depends on the brand and color - metallic or fluorescent versions might need different settings.
Use medium pressure for puff vinyl. Too much pressure can restrict expansion, while too little might cause poor adhesion. The heat activates a chemical reaction that creates gas pockets within the vinyl, causing it to rise.
Following the manufacturer's guidelines is important because different brands formulate their vinyl differently. The wrong settings can result in under-expansion (flat spots) or over-expansion (bubbling).
3. Applying the design
Position your design carefully, remembering that the vinyl will expand outward. Use alignment tools like T-squares or rulers for precise placement.
When pressing, apply even pressure across the entire design. Press for the recommended time - usually 15-20 seconds for most puff vinyl brands.
After pressing, most puff vinyl requires hot peeling. Remove the carrier sheet while the vinyl is still warm for clean edges. If parts of the design lift, you can repress for a few seconds with a cover sheet.
A successful application shows:
-
Even expansion across the design
-
Good adhesion to the fabric
-
Clean edges without lifting
-
Consistent height throughout the design
Cutting and weeding tips for intricate designs
Working with 3D puff heat transfer vinyl requires special attention during cutting and weeding. Its thickness and expansion properties affect how it behaves during this process.
1. Choosing the right blade
Use a 45° blade for most cutting machines when working with puff vinyl. This angle works well with the material's thickness while maintaining precision.
Keep your blade sharp - a dull blade drags through the vinyl instead of cutting cleanly. Signs of a dull blade include:
-
Frayed edges on cut lines
-
Vinyl tearing during weeding
-
Incomplete cuts requiring multiple passes
-
Visible scoring on the carrier sheet
For cutting settings, use moderate pressure and slower speeds than you might with regular vinyl. This helps create clean lines, especially in detailed areas.
2. Performing test cuts
Always do a test cut before running your full design. A simple shape like a small square lets you check if your settings are correct.
After cutting, try lifting a corner with your weeding tool. The vinyl should separate cleanly without stretching or tearing. If it doesn't cut through completely or cuts too deeply into the carrier, adjust your settings and test again.
3. Weeding small details
Weeding puff vinyl can be more challenging than regular vinyl because of its thickness. Use a fine-point weeding tool for precise control, especially with small details.
Work in good lighting so you can clearly see all cut lines. A light pad can be helpful, especially with darker vinyl colors.
For complex designs, weed from the inside out and take your time. This reduces the risk of distorting small elements. Breaking the weeding process into sections helps maintain control over detailed areas.
Troubleshooting common puff vinyl issues
Even experienced crafters encounter issues with 3D puff heat transfer vinyl. Here are solutions for the most common problems:
Insufficient puffing
If your design doesn't rise properly, the likely causes are temperature that's too low, pressing time that's too short, or uneven pressure.
Try repressing with consistent medium pressure and increase the time by 2-3 seconds. Make sure your heat press is properly calibrated and reaches the required temperature across the entire platen.
Over-expansion or bubbling
When vinyl bubbles or expands too much, you're probably using too much heat or pressing too long. Reduce the temperature by 10-15°F and shorten the pressing time slightly.
Check for hot spots on your press that might be overheating parts of the design. Using a laser thermometer to check temperature consistency can help identify problem areas.
Peeling after washing
Poor adhesion that leads to peeling is usually caused by insufficient heat, pressure, or time during application. The vinyl needs to fully bond with the fabric to withstand washing.
For garments that are already made, try repressing the design. For future projects, follow the recommended settings exactly and allow garments to cool completely before washing.
Design distortion
When designs warp or distort during application, it's often because the spacing between elements wasn't sufficient to allow for expansion. Thin lines may close up, and small gaps can disappear as the vinyl expands.
Adjust your design to include more space between elements. Increase line thickness where needed to maintain visibility after expansion.
Care and maintenance for lasting puff
Proper care extends the life of 3D puff heat transfer vinyl designs. The raised texture and adhesion can remain intact through many wash cycles if cared for correctly.
Wash garments with puff vinyl in cold or warm water (below 105°F/40°C). Turn the garment inside-out to reduce friction against the design. This simple step significantly extends the life of the puff effect.
Air drying is ideal for preserving the dimensional structure. If using a dryer, select a low-heat setting. High temperatures can flatten the raised surface over time.
Avoid ironing directly on puff vinyl designs. If ironing is necessary, use a cover cloth and work around the design area.
With proper care, puff vinyl typically maintains its structure through 50+ wash cycles. The color and adhesion remain stable when protected from excessive heat and abrasion.
Advanced techniques with metallic puff and specialty vinyl
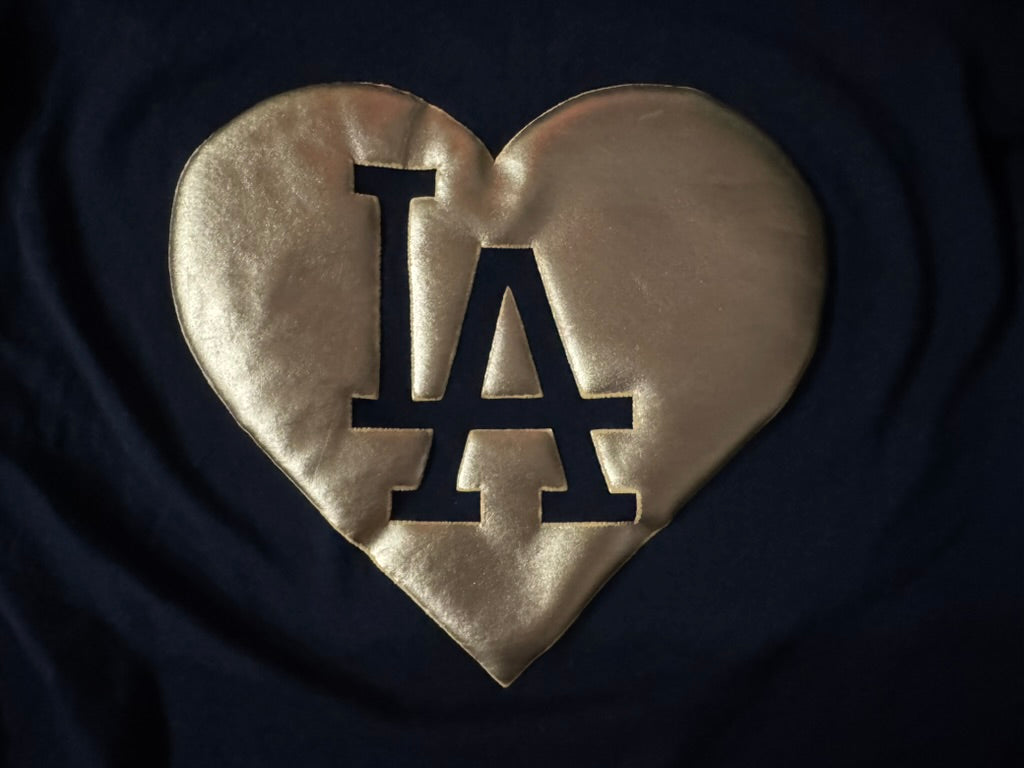
Metallic puff vinyl combines the raised effect with a reflective finish. This specialty material creates eye-catching designs that stand out even more than standard puff vinyl. Other specialty options include fluorescent puff, glow-in-the-dark puff, and textured variations.
When working with these specialty types, remember:
-
Application order matters: Apply flat vinyl first, then add puff elements last
-
Avoid overlapping: Keep puff elements separate from each other to allow proper expansion
-
Adjust settings: Specialty finishes may require different temperatures or pressing times
Multi-color designs using puff vinyl work best when each color is a separate element with space between them. For example, a logo with puff lettering and a flat background can be created by pressing the background first, then adding the puff letters.
Commercial applications for puff vinyl include:
-
Sports jerseys and team uniforms
-
Promotional caps and bags
-
Branded apparel for events
-
Safety gear with raised reflective elements
-
Fashion accessories with dimensional details
These specialty materials follow the same basic cutting and pressing techniques as standard puff vinyl but may require more precise temperature control depending on their finish.
Elevate your projects with 3D puff
3D puff heat transfer vinyl adds dimension and texture to designs that standard vinyl can't achieve. The raised surface creates visual interest and tactile appeal that transforms ordinary garments into standout pieces.
This specialty vinyl works particularly well for athletic apparel, caps, and promotional items where bold graphics make an impact. The dimensional effect gives designs a premium look without the complexity of embroidery.
Different colors and finishes, including metallic and fluorescent options, provide creative flexibility for various projects. Combining puff vinyl with other specialty materials can create unique multi-textured designs.
KIMS Direct offers 3D puff heat transfer vinyl in a range of finishes and sizes, engineered for consistent expansion and durability. These quality materials ensure reliable results for both hobbyists and commercial producers.
Shop our premium 3D puff heat transfer vinyl rolls and other specialty materials at KIMS Direct.
FAQs about 3D puff heat transfer vinyl
Can 3D puff vinyl be layered with regular HTV?
3D puff vinyl works best as the top layer in a design. Apply regular HTV first, then add the puff vinyl as the final layer for proper expansion and adhesion.
What temperature is best for applying 3D puff heat transfer vinyl?
Most 3D puff vinyl requires temperatures between 280-325°F (138-163°C), but always check your specific brand's recommendations as requirements vary by manufacturer.
How long does 3D puff vinyl last on garments?
With proper application and care, 3D puff vinyl typically lasts for 50+ wash cycles while maintaining its dimensional effect and adhesion.
What fabrics work best with 3D puff heat transfer vinyl?
Cotton and cotton/polyester blends provide the best surface for 3D puff vinyl adhesion and expansion, while nylon and leather are not compatible.
How do you prevent 3D puff vinyl from cracking after washing?
Allow designs to cool completely before stretching, wash garments inside-out in cold water, and avoid high-heat drying to maintain the dimensional effect.


