T-shirt transfer paper is the cheapest and simplest way to put a custom design on a shirt. You print your design on special paper with a regular inkjet printer, then iron or heat press it onto the fabric. No cutting machine, no weeding, no vinyl. Just print and press.
That simplicity comes with trade-offs. Transfer paper produces designs that don't last as long as HTV or DTF, the feel on the fabric is heavier, and the results look noticeably less professional. This guide covers how transfer paper works, when it's the right choice, how to get the best results, and when you should use something else instead.
Transfer Paper vs HTV vs Printable HTV: What's the Difference?
These three methods all use heat to put designs on shirts, but they work differently and produce different results. This is the comparison most guides skip:
| Feature | Transfer Paper | Cut HTV (Heat Transfer Vinyl) | Printable HTV |
|---|---|---|---|
| What it is | Coated paper you print on with an inkjet printer | Colored vinyl you cut into shapes with a Cricut/Silhouette | White/clear vinyl you print on with an inkjet, then cut |
| Equipment needed | Inkjet printer + iron or heat press | Cutting machine + heat press or iron | Inkjet printer + cutting machine + heat press |
| Cutting machine required? | No — cut with scissors | Yes | Yes |
| Design type | Full-color, photos, anything you can print | Solid colors only (1 color per layer) | Full-color, photos, anything you can print |
| Feel on shirt | Heavy — entire rectangle of transfer paper bonds to shirt | Thin vinyl layer — only the design touches the shirt | Thin vinyl layer — only the design touches the shirt |
| Durability | 10–20 washes before fading/cracking | 50+ washes | 30–50 washes |
| Cost per shirt | $0.50–$1.50 (paper only) | $0.50–$3.00 (vinyl) | $1.50–$3.00 (printable vinyl + ink) |
| Startup cost | $10–$15 (just buy paper) | $235–$615 (need cutting machine) | $235–$615 (need cutting machine + printer) |
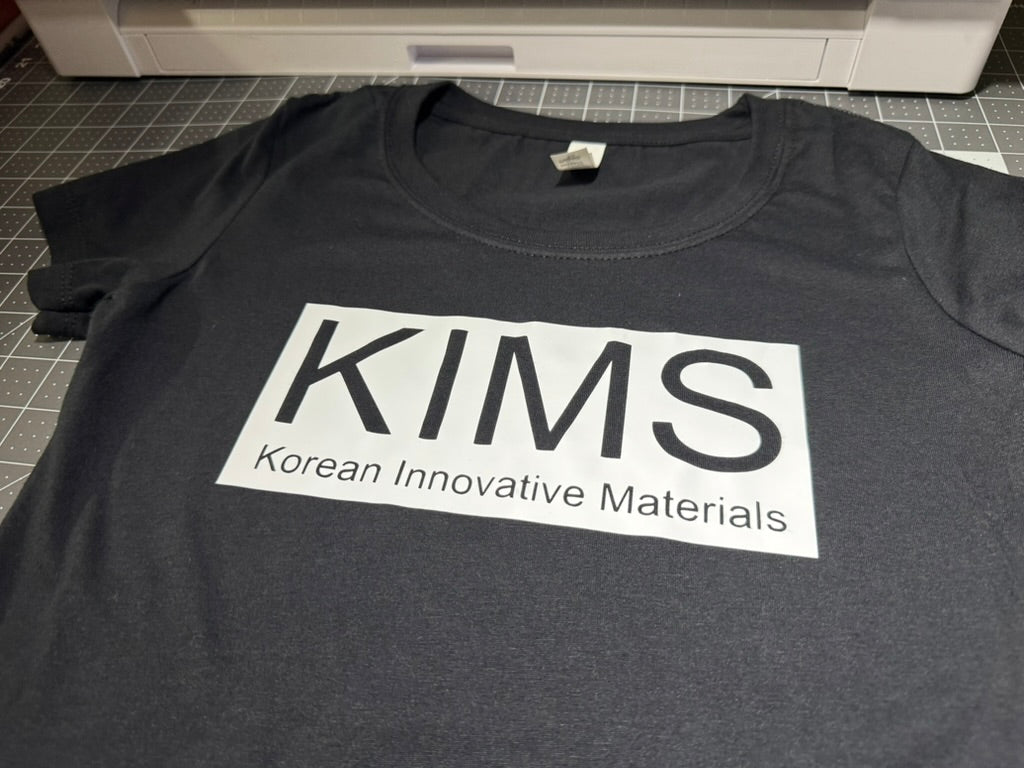
| Professional look? | Decent — visible film around design on light paper | Yes — clean edges, no background | Yes — clean edges with full-color designs |
The key difference: With transfer paper, the entire printed area (including the background around your design) transfers to the shirt. With HTV and printable HTV, only the design itself transfers — no background, no film border. This is why HTV looks cleaner and more professional.
When Transfer Paper Is the Right Choice
Despite its limitations, transfer paper makes sense in specific situations:
You don't own a cutting machine. If you don't have a Cricut, Silhouette, or other vinyl cutter, transfer paper is your only option for putting custom designs on shirts at home. All you need is an inkjet printer you already own and a $10 pack of transfer paper.
One-off personal projects. Making a single birthday shirt, a costume piece, or a joke shirt for a party? Transfer paper is fast and cheap enough that the lower durability doesn't matter. You're not selling it — you just need it to look decent for one event.
Testing a design before investing in better methods. Print a test version on transfer paper to see how the design looks on fabric before committing to HTV or DTF.
Full-color photos without a cutting machine. If you want a photograph or complex full-color image on a shirt and you don't have a cutting machine for printable HTV, transfer paper is the simplest path.
When You Should Use Something Else
If you're selling shirts — use HTV for solid-color designs or DTF for full-color. Transfer paper fades too quickly for products you're charging money for. Customers will be disappointed after a few washes, and you'll get complaints or returns.
If you want a professional look — transfer paper leaves a visible film/border on light fabrics. Cut HTV produces clean, sharp edges with no background. Printable HTV gives you full-color capability with the same clean edges.
If durability matters — transfer paper designs typically degrade after 10–20 washes. Quality HTV lasts 50+ washes. If the shirt will be worn and washed regularly, HTV or DTF is the better investment.
If you're making dark-colored shirts — dark transfer paper works but produces a stiff, rubbery feel on the fabric. HTV on dark fabrics feels thin and comfortable by comparison.
For a complete breakdown of all decoration methods including startup costs and per-shirt economics, see our HTV vs DTF vs sublimation comparison.
Two Types of Transfer Paper
Light Transfer Paper (for white and light-colored shirts)
Light transfer paper has a clear or translucent coating. The white areas of your design become transparent on the shirt, so the shirt color shows through. This means it only works on white or very light-colored fabrics — on a yellow or grey shirt, your design's colors will shift because the fabric color shows through the transparent areas.
How it works: You print your design, mirror it (flip it horizontally), cut around it, then press it face-down onto the shirt. The heat transfers the printed ink from the paper to the fabric.
Important: You MUST mirror/flip your design before printing. The paper is applied face-down, so text and images need to be reversed. If your design reads correctly on the paper, it will be backwards on the shirt.
Dark Transfer Paper (for dark-colored shirts)
Dark transfer paper has an opaque white base layer. This white layer blocks the dark fabric from showing through your design, allowing the printed colors to remain vibrant on black, navy, red, or other dark shirts.
How it works: You print your design (do NOT mirror it), cut closely around the edges, then press it face-up onto the shirt. The white base and printed design transfer together.
Important: Do NOT mirror your design for dark transfer paper — it's applied face-up, not face-down. Also, cut as close to the design as possible. Any excess paper around the design will transfer as a visible white border on the dark fabric.
Step-by-Step: Applying Transfer Paper
What You Need
Inkjet printer (laser printers require special laser transfer paper — standard transfer paper is for inkjet only). T-shirt transfer paper (light or dark, matched to your shirt color). Scissors or rotary cutter. Iron or heat press. Hard, flat surface (a table covered with a pillowcase — NOT an ironing board, which is too soft and cushioned for proper pressure). Parchment paper (for the final press step).
Step 1: Print Your Design
Set your printer to the highest quality setting. Select "photo paper" or "specialty paper" as the paper type in your printer settings — this ensures maximum ink output for vivid colors. Print on the coated side of the transfer paper (the side that feels slightly slick or waxy).
For light transfer paper: Mirror/flip your design before printing.
For dark transfer paper: Print the design as-is, no mirroring.
Let the printed paper dry completely — at least 10 minutes. Wet ink will smear during pressing and ruin the transfer.
Step 2: Cut Around Your Design
For light transfer paper: Leave a small margin (about 1/8 inch) around the design. The clear coating is mostly invisible on light shirts, so precision isn't critical.
For dark transfer paper: Cut as close to the design edge as possible. Any excess will show as a white rectangle on the dark fabric. Take your time here — this step directly affects how professional the result looks.
Step 3: Prep the Shirt
Pre-wash the shirt without fabric softener to remove sizing chemicals that interfere with adhesion. Iron or pre-press the shirt to remove wrinkles and moisture. Place the shirt on your hard, flat surface.
Step 4: Position and Press
Place the transfer paper on the shirt:
Light paper: Face DOWN (printed side touching fabric).
Dark paper: Face UP (printed side visible, white backing touching fabric).
| Setting | Heat Press | Household Iron |
|---|---|---|
| Temperature | 375°F (190°C) — hotter than HTV | Cotton setting (highest heat, NO steam) |
| Time | 20–30 seconds | 30–60 seconds (multiple passes) |
| Pressure | Firm | Press hard with body weight — don't glide |
| Steam | Off | OFF — steam causes smearing and poor adhesion |
Critical: Turn OFF the steam on your iron. Steam introduces moisture that prevents the transfer from bonding properly. This is the #1 cause of failed transfers with an iron.
With an iron, press firmly for 15 seconds in one spot, lift (don't slide), move to the next section, press again. Cover the entire design with overlapping presses. Then flip the shirt over and press from the back for another 15 seconds.
Step 5: Peel the Backing
Check your transfer paper's instructions for hot peel vs cold peel:
Most light transfer papers: Cold peel — wait until completely cooled (2–3 minutes), then slowly peel the backing paper starting from one corner.
Most dark transfer papers: Hot or warm peel — remove the backing while still warm, peeling slowly at a low angle.
If any part of the design lifts with the backing, lay it back down and press again for 10–15 more seconds.
Step 6: Final Press (Optional but Recommended)
After removing the backing, place parchment paper over the design and press one more time for 5–10 seconds. This smooths the surface and improves adhesion, especially around edges.
Making Transfer Paper Last Longer
Transfer paper will never last as long as HTV or DTF, but proper care extends its life significantly:
Wait 24 hours before the first wash. The adhesive needs time to fully cure.
Wash inside-out in cold water on a gentle cycle. Hot water and agitation are the biggest enemies of transfer paper designs.
Air dry or tumble dry on low. High heat in the dryer degrades the transfer faster than anything else.
Never iron directly over the design. If you need to iron the shirt, iron inside-out or place parchment paper over the design.
No bleach, no fabric softener. Both break down the transfer coating.
With proper care, a good transfer paper design should last 15–25 washes before noticeable fading. Without care (hot water, high-heat dryer), you might see degradation after 5–10 washes.
Common Transfer Paper Problems and Fixes
Design is backwards on the shirt. You forgot to mirror the design (light transfer paper only). Dark transfer paper doesn't need mirroring. Unfortunately there's no fix — you'll need to reprint and redo.
Design didn't transfer completely. Usually insufficient heat or pressure. Reposition the backing over the missing area and press again at higher temperature for longer. With an iron, the most common cause is not pressing hard enough — lean into it with your body weight.
Colors are faded or washed out. Check your printer settings — make sure you're on the highest quality setting with the paper type set to photo or specialty paper. Also check ink levels. Low ink produces faded prints.
Transfer feels stiff and plasticky. This is normal for transfer paper, especially dark transfer paper. The entire transfer coating bonds to the fabric, creating a noticeable layer. This is inherent to the method. If the stiff feel bothers you, HTV produces a much thinner, softer result. See our best HTV guide for options.
White border visible around design on dark shirt. You didn't cut close enough to the design edge. With dark transfer paper, any excess paper shows as a white rectangle. Cut as close to the design as possible before pressing. A rotary cutter or craft knife produces cleaner cuts than scissors for tight curves.
Design cracked or peeled after a few washes. Transfer paper is less durable than HTV by design. If you're getting cracking or peeling after only 3–5 washes, the likely cause is washing in hot water or using high-heat dryer settings. Switch to cold water and low-heat drying.
The Upgrade Path: Transfer Paper → HTV or Printable HTV
Most people who start with transfer paper eventually move to HTV or printable HTV. Here's when to make each upgrade:
Upgrade to cut HTV when: You want designs that last 50+ washes instead of 15–20. You want a thinner, softer feel on the shirt. You're making shirts to sell. Your designs are primarily text, logos, or 1–3 color graphics. You're ready to invest in a cutting machine ($130–$300). See our beginner's guide to HTV to get started.
Upgrade to printable HTV when: You want full-color designs with the durability and clean edges of HTV. You already have (or are willing to buy) a cutting machine. You want the best of both worlds: print-any-design capability plus no visible background/border. KimsDirect Printable PU HTV works with standard inkjet printers and cuts cleanly on Cricut and Silhouette machines. For the step-by-step process, see our printable HTV guide.
Upgrade to DTF when: You're producing volume (10+ shirts per day) and want full-color capability without cutting or weeding. DTF requires a specialized printer ($1,500+) but produces professional results on any fabric. See our HTV vs DTF vs sublimation comparison.
Frequently Asked Questions
Can I use transfer paper with a laser printer?
Standard inkjet transfer paper does NOT work with laser printers — the heat from the laser fuser will jam or damage the paper. You need laser-specific transfer paper, which uses a different coating designed to work with toner instead of ink. Check the label before buying.
Is transfer paper the same as HTV / iron-on vinyl?
No. Transfer paper is paper you print on with a regular printer. HTV is vinyl you cut with a cutting machine. They're completely different materials with different processes and different results. HTV is more durable, thinner, and looks more professional. Transfer paper is cheaper and doesn't require a cutting machine.
How many washes will a transfer paper design last?
With proper care (cold water, inside-out, low-heat dry): 15–25 washes before noticeable fading. Without care: 5–10 washes. Compare to HTV at 50+ washes and sublimation which is essentially permanent.
Do I mirror the design for light or dark transfer paper?
Mirror for light transfer paper (it's applied face-down). Do NOT mirror for dark transfer paper (it's applied face-up). Getting this wrong is the most common mistake and there's no way to fix it after printing.
Can I use transfer paper on polyester?
Most inkjet transfer papers are designed for cotton or cotton-blend fabrics. Some brands work on polyester, but you need to use a lower temperature (325–350°F instead of 375°F) to avoid scorching the polyester. Check the transfer paper packaging for fabric compatibility. For polyester shirts, printable HTV or sublimation generally produce better results.
Why does my transfer feel stiff and heavy?
That's normal for transfer paper. The entire coating layer bonds to the fabric, not just the ink. Dark transfer paper feels even heavier because it includes an opaque white base layer. If the stiff feel is a dealbreaker, switch to cut HTV (for solid-color designs) or printable HTV (for full-color designs) — both produce a much thinner, softer result.